Ballet Moves for Beginners

Are you dreaming about a career as a ballerina or just want to try classical dance for yourself? These simple (ha-ha) ballet moves for beginners will help you understand what ballet is and is it fits you.

Are you ready? There are 9 ballet movements that tone the muscles of the whole body. Let’s go.
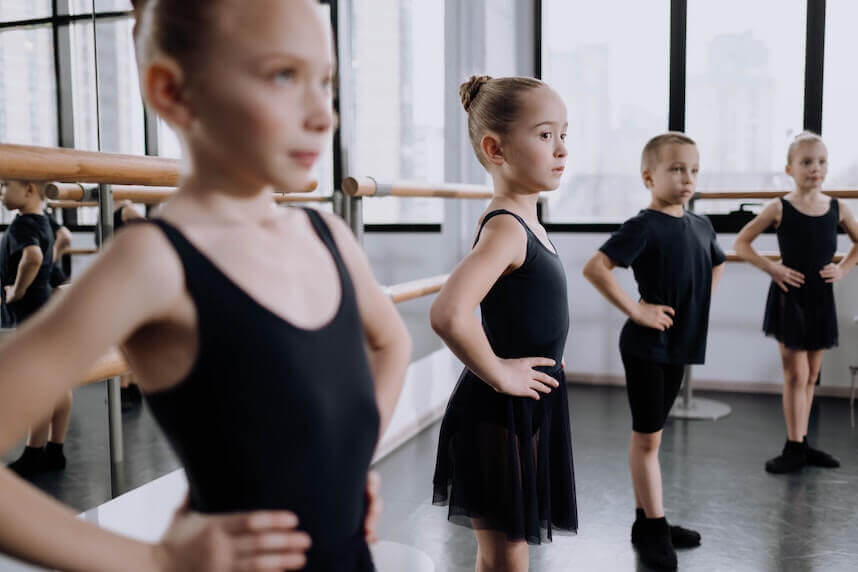
Students learning to ballet dance - beginners moves
Photo by Cottonbro Studios on Pexels

PLIÉ

Plié in the first position is one of the basic elements of ballet. Stand in the first position and start bending your knees slowly until your knees are over your thumbs. Hold on to this position for a second and then return smoothly and quickly upwards. Complete the movement in the first position.

Plié should be performed in all 5 main ballet positions. There are two types of pliés: demi and grand.

GRAND PLIÉ

The Grand Plié also performs from the first position, but unlike the Plié, you sit much lower, tearing your heels off the floor.

RELEVE

Releve is a basic movement that almost all newcomers learn. To perform a simple releve, take the first position and hold the ballet barre with one hand. Tension the caviar muscles and pull up to be on your socks. Transfer all the weight to the part of the foot that is under your fingers. This position is called the demi-pointe. Then gently fall down.

Try to do single-leg releve as well. This exercise is good for strengthening the back surface of the hip and calf.

Over time, you try to connect the plié and the releve. First, make a plié and then climb up in the releve using the strength of your feet on climbing.

BATTEMENT TENDU

Battement tendu is an exercise in which the working leg is either pulled aside and then returned, or bent and unbent. There are several different types of battement with which you can practice the ability to correctly move your leg back to the original position, bend and stretch the leg, pull it out and lift it to any height in any direction and at any speed.

JETE

In this exercise, the working leg moves in three directions: forward, to the side, back and again to the side. But the sock is detached from the floor every time. The leg is raised to the position in which it will make from the other about 45 degrees. After making the whole chain of movements, repeat the jete from the other leg.

ROND

Push your right foot forward without tearing your sock off the floor. Smoothly, drawing a semicircle, move it to the side and then back. Return to the original position, repeat 6 times with each foot.

FONDU

Lower into the demi-plie by bending the supporting left leg and leading the sock to the right of the ankle stone. Unbend the supporting leg and pull the right one forward. Return to its original position. Repeat the movement by pulling the right foot to the side, but then lower into the demi plié, leading the right foot behind the shin with the left foot. Straighten the supporting leg by pulling the right foot back. Move the side again and return to the original position. Perform the exercise 4 times from each leg.

SAUTE

Saute is a jump with no position change. It is convenient for learning the mechanics of jumping with novice students. Its study is started separately, with pauses before each jump. Saute consists of three main points: half-sitting (preparation for the jump), the jump itself and landing (half-sitting). The jump is made by jumping with the pushing of heels from the floor.

During the jump, the legs in the air are stretched in the knees to the limit, toes are stretched too, and the body is straight, no tension, the legs in the air retain the given position. When landing after the jump, the socks touch the floor first, then the whole foot is lowered and a half-squat is made evenly on both feet. Keep the body straight.

ADAGIO

Get in the fifth position. Push your right foot forward as in a battement tendu, but then raise it, straight, to the parallel with the floor. Go back to the fifth position and also through the battement tendu lift the foot to the parallel with the floor to the side. Then make the same move back, again to the side and return to the original position. Repeat with the other leg.

So, after these ballet moves for beginners, are you ready to wake up the ballerina inside of you?


Related articles:

Arabian dance in the nutcracker

The “Arabian” Dance in The Nutcracker

Christmas is around the corner, and if you are a Ballet enthusiast like me, you probably know that The Nutcracker recital has come to almost every city around the world. If you need to become ...
Ballet feet exercise. Ballerinas feet warming up stretching

Ballet foot exercises

10 Ballet Foot Exercises: Warm-up, Boost Your Technique and Foot Strength Foot exercises are an essential part of a ballet dancer’s training as they provide important strength and technique benefits. Developing strong and flexible feet ...
Ballerinas Feet. 3 ballet dancers stretching

Ballerina Feet: Ballet & Foot Health

If you’ve ever seen ballet or you’re a ballet dancer yourself, you’ll know how graceful dancers’ movements can be. But, of course, becoming a professional ballet dancer takes a LOT of hard work and dedication ...
Images of dancers on stage - moving to the best choreography, inspired by talented choreographers

The 9 Greatest Choreographers of the 20th century

This article see the DanceBible team pick some of the 20th century's (and all times!) greatest Choreographers, taking a historical slant via some very great and distinct contributions, which together help to describe the formation ...


Also interesting to read:

Basic Hip Hop Moves for Beginners

To begin learning basic hip-hop dance, it is important to start with the basics. This includes getting a feel for the rhythm and music and learning the basic movements. In this tutorial, we provide a detailed breakdown of these foundational techniques, along with a selection of the best video tutorials to help you master hip-hop beginner moves. By starting with these simple steps, you can build a strong foundation for your hip-hop dance journey.

Basic Hip Hop Moves.

Groove

The groove involves alternating between bent and extended knees, in time with the beat. When you bend your knees and swing down, it accentuates the forward tilt of your body. By swinging up and extending your knees, you align yourself as if pushing off and create a slight tilt backwards.

The movement should be done expressively, with muscle tension, but the viewer should see a relaxed dancer. Performing groove, you will feel the music and rhythm. Then the groove can be varied by swinging movements of the hands and light tilting of the body to the sides.

Try to make a groove to different music with different tempo and rhythms. The better you do it, the faster you can choose faster music.

You can make a groove with an accent downwards – then the initial position will be with even legs. Or you can do a groove with an accent upwards, in which case you can start with bent knees.

Tone wop

It’s a basic movement taught to beginners in hip-hop. It needs to be studied to a degree of automation. During Tone Wop, the dancer takes small steps and “closes” and “opens” the feet.

You can take a step in any direction you want – backward, to the side or you can walk all the time just forward. But for starters, we recommend moving only in one direction to understand the structure of the movement.

Rhythm: on the score “once” we make a step, on the score “and” – “close” the stops, on the score “two” – “open”.

When you feel confident in this movement, try to add a variety of hand and body movements.

Brooklyn Bounce

– is a swing with crossed legs. Let’s start with Bounce. You can practice it as follows: jump up slightly and, once you land, bend your knees gently. Do it a few times – you should feel like you’re jumping like a ball, only smoothly and gently.

Next, try to learn how to work your legs:

Criss Cross

It’s a movement in which the legs cross in a jump with a groove. It may seem that the movement is very simple, but it is worth remembering that it is performed at a very fast pace and in conjunction with other elements, so the clarity of execution must be honed in the first class.

Salsa Rock

A little cardio – low jumps in place. The movement consists of throwing one leg forward while making a small jump backward with the support leg. Then the same movement must be done on the second leg. The body and arms are directed towards the jump (most likely this part will be obtained by inertia).

Sham Rock

– is a bailiff system with a twist and a final jump. Professional dancers beautifully capture each phase of the movement and place accents on the shoulders.

Dougie

The fashion movement Dougie looks cool to any music. These are legs with the foot turned inside out and hands walking beautifully in the opposite direction. The width of the step, the degree of bending of the knees, the waving of hands, and the general mood of the performance – all make this element into a full dance.

FAQ

What are the basic movements of hip hop?

The very first thing to start studying hip-hop is groove.
A list of basic movements:

  • Groove:
  • Tone wop;
  • Brooklyn Bounce;
  • Criss Cross;
  • Sham Rock;
  • Dougie

How do you do basic hip hop moves?

First, it is necessary to study the technique of execution of this or that movement, then – to bring the execution of the movement to automatism. After that, add the groove and freedom in your movements with your hands.

How can I learn hip hop?

It’s best to learn to hip-hop in a specialized dance studio. Under the guidance of the coach, classes will be held as productively as possible. If this is not possible, you can start with video lessons on YouTube. Watch more videos of cool professional dancers dancing – it will help you “catch” style and technique.

Here’s some other articles relating to hip hop and street dance:

House dance, street dancing

House Dance

Urban and street dances have always been able to go beyond traditional barriers and really connect people through movement. House dance does just this, hand in hand with the electronic ...
Popping dance on the street

Popping: Dance with Precision. 3 beginner techniques.

What is the popping dance technique and how do you 'Pop'? Popping is a style of street dance, where dancers quickly tense and release muscles (sometimes known as ‘hitting’ or ...
An image of a clown at a fair. Article about Clowning dance

Clowning Dance: Tommy the Clown & Hip-hop Clowns

What is clowning dance? Clowning dance (also known as clown dancing) is a unique and entertaining form of dance expression in the early 1990’s. It was developed by Thomas Johnson, ...
Street dance styles. Photo of male breakdancer in square outside tall building

Street Dance Styles

Street dance styles. When you hear the term "street dancing," what comes to mind? Do you think of hip-hop? Breakdancing? House dancing? Street dance is a broad term that encompasses ...
street dance

Best Street Dancers in the World

It is nearly impossible to accurately rank the top street dancers in the world, as each has their own distinct style and talent. While there are many skilled street dancers ...
Breakdancer performing in front of the crowd

What is Break Dance?

What is breakdance? You probably have a pretty good idea of breakdancing but maybe you're not close to the details and how to get started? Let us give you an ...

Cover photo by Breakreate on Unsplash

TOP 10 Basic Pole Dance Moves for Beginners

The TOP 10 basic pole dance moves for beginners. These moves can be central to learning how to pole dance :

In todays guide, our resident pole dance instructor takes you through her favorite moves and how to perform them well.

So, let’s take a closer look at the basic pole dance moves for beginners. Good luck!

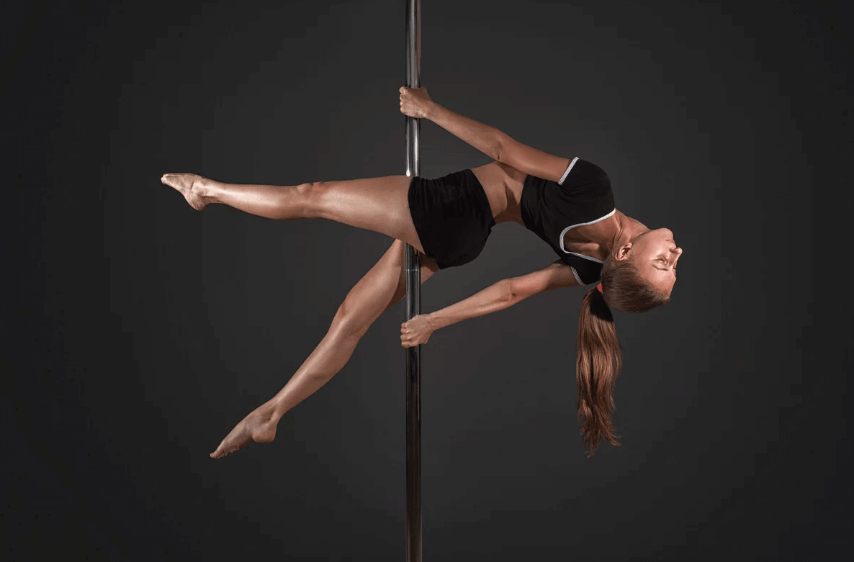
Horizon variation on the pole.
Pole dance photo by chesterf on Shutterstock

Beginner pole spins

We’ve chosen a few easy, simple spins that look beautiful and spectacular. Most likely, you will be taught to perform them in the dance school at the first lesson of pole dance. You can also learn these in online pole classes if you have your own pole at home.

1. The Chair Spin:

A classic to start with. Here’s how to do the chair spin in 5 easy steps:

  • Stand by the pole with your feet on the floor
  • Place your inside hand (the one closest to the pole) high on the pole, and your outside arm at chest height.
  • Swing your outside leg back and then to create momentum while your other knee is lifted and raises to meet the other leg
  • Use your outside hand to push your body away from the pole (otherwise, you’ll bump your hips on the pole) resulting in bruises. So, focus on maintaining a safe distance from the pole with your outside hand.
  • When you’re near the end, put your feet down and perform a graceful roll up.

Once you’ve mastered this from a standing start, why not try walking in to the chair spin pose.


Another variation of the chair spin is when you take your legs off the parquet and put them in a foot-on-foot position. Do not forget to bend your back when performing the element to make the posture look even more still and elegant.

The spin is can be performed on both static and rotating poles. After more practice, when you find that your hands and grip become stronger, you can eventually try the chair spin on one hand.

2. Front and Backward Frog Spins:

These are great poses for beginners on the pylon and a lot of fun. Perform this move in 3 steps:

Forward Frog Spin:

  • Grasp the pole with both hands, as in the previous chair spin exercise.
  • Then we make a swing forward and around the pole, grab the pole under the knee with leg close to the pole.
  • Raise your second leg and connect both legs at the toe to form the ‘frog’ posture.


The element also has a variation of the execution backward, as the ‘backward frog’:

  • Note that the starting position in this twist is different. The arm close to the pole is at eye level and has a grip on the pole in the armpit area.
  • The furthest arm is flat and holds the pole above the head.
  • From this position, push your feet back. When you start spinning, cling to the pole with your near-foot under your knee and bring your socks together.

3. Soldier’s spin

It is an important link between more complex tricks in compositions and dance numbers.

The element
Image featuring the x-pole portable dance pole

To perform the soldier spin:

  • Stand in front of the pole
  • Take two hands higher to be able to pull up further on the arms.
  • Step right foot forward, left foot forward, swing a little to start spinning.
  • Then push your feet off the parquet and at the same time pull up on our hands so that your hands are at chest or neck level.
  • In the straight position, we spin in the “soldier” position.

Beginners Pole Moves with Acrobatic elements

The following elements, in addition to plastics, will require you to have basic skills in acrobatics.

4. Basic Climb

Climbing up the pole is a crucial part of a developing dancers repertoire.

To begin climbing up the pole, follow these simple steps:

  • Lay one leg up on the pole slightly diagonally that way with the inside of the knee and ankle pressed against the pole. Feel the grip on the pole.
  • Place your hands as high as possible by grabbing the ring upwards.
  • You should place the second leg in front of the pole on the back of the shin under the heel.
  • Clamp the pole with your tibia and knee sides. Make sure the front foot is tight and not beveled.
  • Straighten the body by holding the pole with your hands and feet.
  • Bend your hands and lean your body into the pole. Now you will hold on to your hips as well.
  • Next, you need to move your hands higher and holding hands, move your bent legs also upward. Hold the pole by your ankles.
  • Then, with your back leg push away from the pole to move the hold to your knees.
  • Repeat all the movements you’ve already done before: straighten up, move your arms, tighten your legs, move your knees.
Young lady doing the pole climb using her knees and hands, as a beginner pole move
Image by antoniodiaz on Shutterstock

The second option is to use the forearm. That is, one hand remains straight, and the other – bent. The elbow is just below the shoulder and we rest our forearm on the pole diagonally. The use of an elbow allows you to use your knees at once and avoid needing to push them away from the pole.


5. Horizon and Basic Plank:

Horizon.

We recommend that you learn how to make the horizon on the static pole from the floor.

  • Stand as close to the pole as possible and grip the pole with your hands at approximately head level.
  • Pinch your stomach to the pole and raise your legs forward on both sides of the pole and squeeze it with your thighs.
  • Turn your pelvis one way, for example to the left.
  • Your feet should be crossed and use the heel of the upper leg to prevent it from sliding off the lower leg. Your toes should be pointed.
  • While keeping the body twisted, lower your hands down the pole and then gradually straighten them out.
  • Let go of the hand of the same name lower leg (in our case – left leg). So you hold the pole with your right hand and hip, with the body straight or with a slightly bent back.
  • If you feel that your thighs are not gripped enough with your pole, you can start practicing the horizon without falling completely horizontally with the floor, and leave the body diagonally to the floor, degrees 45 degrees. Over time, you will reach the desired position.

6. Hello Boys

The 'Hello boys' beginner pole dance move
Photo by BraunS on istock

How to perform the ‘hello boys’ pole move:

  • Perform a base climb
  • Clamp the pole between straight legs, twisting the pelvis into the lower leg on the side so that the back surface of the hip is pressed well against the pole.
  • Tilt harder towards the lower leg and grip the pole with the hand on the same side, just below the thigh.
  • Continue to hold the second bent arm approximately at head level.
  • Next, you should feel the grip of the lower leg’s thigh on the pole, never carrying the weight on the lower hand. We should not sit on the hand, it only helps a little.
  • Turn your body backward by straightening the upper arm, this will allow for a better hip-to-pole grip.
  • Feel whether you are holding on to your hip or hand.If you can hold your thigh and hands with confidence, try to tear off your upper leg from the pole.
  • If it is possible to hold on to the hip, move the upper leg to the side in the “spread” position.


7. Hood Ornament (Cricket)

So to tackle the Hood Ornament pose, follow these simple steps:

  • Stand sideways to the pole as close as possible on your fingers. Grasp the pole with your near armpit and place your far arm straight arm as high as possible.
  • The near-arm should be bent, with elbow facing down.
  • Now cling to the pole with your near knee. That is, press your straight leg in front under the knee, then bend it.
  • The knee looks down, the pelvis looks forward.
  • Now, hold by your arms and under the knee, raising your far leg and move straight back. Lean back into the pole with your ankle.
A pole dancer performing the Hood ornament Cricket move
Photo by Aikis on Shutterstock

If you feel confident in this position, while holding your armpit by the pole, try to release your near arm and straighten it in front of you.
Then you can look to straighten both of your hands. The next step, as you continue to improve, is to perform this element after climbing up the pole.


8. Chopper (Invert V, Straddle)

This is a great pose. A few steps to perform the Chopper:

  • Position yourself sideways to the pole.
  • Place your inside arm with a forearm grip at shoulder height, and your outside arm just above it.
  • Stand on your tiptoes and step forward with your inside foot, making sure your hips are in front of the pole.
  • As you pull on the pole with your arms, lift your tiptoes off the ground while keeping your legs straight.
  • Open your legs in a V-shape and allow your head to drop back. Aim to have your arms as straight as possible in this position.
  • You did it!
  • Now, to exit the pose, lift your head toward the pole and carefully lower your legs, keeping them slow and controlled.

By entering and exiting the move slowly, you will be building up muscular strength, which over time will help to make this move even more controlled.


9. Martini

Tasty drink and a cheeky little pole move. To perform the Martini:

  • Lift and lean the straight leg to the front surface of the pole under the knee and bend the leg.
  • Then, while maintaining a good knee grip, lower the pelvis down, increasing the area of grip on the pole.
  • Hold the pole with both hands, with the near one on top.
  • Now raise the far leg and move it straight from the front of the pole, press it against the near leg, the stretched foot looks up into the diagonal.
  • The elbow hooks at the back of the pole and with the palm of your hand holds the straight leg from the front.
  • If you’re sure you’re holding on well, you can remove the other hand from gripping the pole and get creative with your pose.
  • You’ve made a martini!


10. The hang on the leg

We’ll cover a couple of variations of this move, hanging on the near and the far leg.


The base hang on the far leg

A beginner hanging on a dancing pole by her near leg with arms outstretched
Photo by Petr Smagin on Shutterstock
  • Run the chopper, lift the pelvis as high as possible.
  • Keep your shoulders down, do not raise them to your head. Stretch your back as far as possible without rounding it up.
  • Place your far leg against the pole under your knee and bend your knee as tightly as possible.
  • Move the lower leg back straight, but make sure you stay on the pole well with your knee and side. Also, clamp the pole with the armpit of your near hand.
  • If you feel confident in this position, gently move your hand backward first, holding the pole firmly under your armpit and then do the same by your far arm.

You’ve done the hanging on your far leg!


The hanging on your near leg

Pole dancer learning to hang by near leg
Photo by BraunS on iStock

If you hold the pole under your knee in the hanging on the far leg, the hanging on the near leg assumes that the inner surface of the hip and shin will grip.

Run the chopper, but do not lift or press the pelvis too close to the pole. Leave it slightly behind. Hold the pole sideways to the pole and grip the pole with your near-foot in the inner thigh and tibia area. After that, lower the top of the body down and grip the pole with the armpit. Lower your head down. If you hold on well, keep your hands back, keeping your armpit, hip, and shin together.

Bonus Move: 11. Barrel with wide grip

We know this was a ‘top 10’ moves article but why not enjoy one last move for the road?!

Technique of the element:

To perform the barrel with a wide grip:

  • Stand facing the pole, grip the pole with your hands with a wide grip, the lower arm with the ring facing down straight (but do not turn off your elbow).
  • The upper arm with the ring facing up is bent about 90 degrees in the elbow. Watch your wrists, do not let them twist.
  • Next, raise the bent leg and the lower arm of the same side and press the front of the thigh against the pole.
  • At the same time, tilt the body slightly towards the lower arm.
  • Then, hold on firmly to the pole and gently lift the second leg upwards and press the front of the hip against the pole.
  • At the same time, lean towards the lower arm. Hold this so that your belly presses against the pole too.
  • As you enter the barrel, your lower arm slips slightly down and your upper arm straightens (but not completely).
  • Try to keep the body parallel to the floor.

You have made a barrel with a wide support grip!


Tips for beginners

  1. Wipe the pole all the time. Before, during and after training, wipe the pole with an alcohol solution and a soft cloth at all times. This will help to keep the pole dry all the time for a better grip on your skin. This means that there is less chance to get injured, and in general, it is easier to perform tricks and elements on a dry wiped pole.
  2. Wear shorts and a top. Many beginners are embarrassed to wear suitable pole dance clothing in the first few lessons. Don’t worry! This shape will allow you to stay on the pole better and not to slide. Again, it’s safer than training in leggings and T-shirts. You’ll always have to make hooks under your knees, armpits, waist level, and between your thighs. Doing this with your skin open is much easier.
  3. Think about magnesia. Many pole dancers use a special remedy for dry skin – magnesia. It’s the same substance that bodybuilders use, for example, to lubricate their hands to take the weight of the barbell. In the case of the pole, magnesium powder like this one on Amazon is most suitable. But if your palms are dry enough without it and do not sweat, try without it.
  4. Don’t worry if you can’t do something at first. In the beginning it can be difficult. But with a little effort, you will not notice how progress will become more obvious not only for you but also for the coach. It won’t be so difficult for you to do climbing, you will be able to do a variety of twists and beautiful handstands after a few weeks of training. The main thing is to keep your hands up and work on yourself. Remember, nothing is easy to start with and you will definitely succeed with some effort!


When you’ve mastered these starter pole moves, it’s time to take a look at intermediate pole dance moves.

Related articles on pole dancing:

Intermediate Pole Dance Moves

Intermediate Pole Dance Moves

Intermediate pole dance moves is the natural step in our series from our popular article on beginners pole dance moves. We hope that being around halfway on you’re journey learning to pole dance you feel ...
Image of young female dancer pole dancing for weight loss

Pole Dancing for Weight Loss

Pole dancing for weight loss is quickly becoming popular. Even when people are starting with beginner pole moves and work up to the more challenging routines. Many people are interested in pole dancing for weight ...
Benefits of Pole Dance. Pole dancer showing impressive grip and stretch of the legs

Benefits of Pole Dancing

When some people think of pole dancing, they may think of a sleazy strip club. However, pole dancing is becoming increasingly popular as a sport in it's own right, a great form of exercise and ...